
 English
 عربى
عربى русский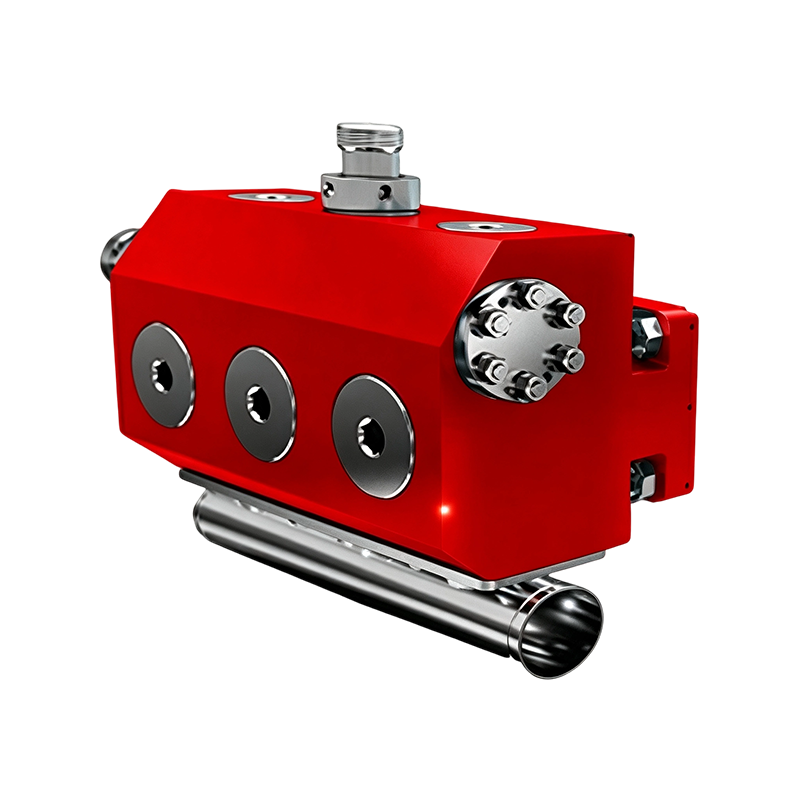
WELL SERVICE EQUIPMENT JWS-400 Triplex Pump at a Glance The JWS-400 is a single-acting triplex reciprocating pump designed for high-pressure, intermittent-duty well service operations. Published tech...
READ MOREUltimate Guide to Fluid End Maintenance and Replacement Parts for JWS-400 Triplex Pumps
Content
- 1 Why Fluid End Condition Determines Triplex Pump Uptime
- 2 Component Wear Rates: Where Failures Actually Start
- 3 Reading the Cost Curve: When Preventive Replacement Pays Off
- 4 Downtime by Failure Cause: What the Data Shows
- 5 Choosing Replacement Materials: A Multi-Factor Decision
- 6 How to Replace Fluid End Components Without Extending Downtime
- 7 Field Practices That Extend Fluid End Life
- 8 Fluid End Considerations Specific to the JWS-400 Platform
- 9 Frequently Asked Questions
- 9.0.1 Q1: How often should fluid end valves and seats be inspected?
- 9.0.2 Q2: Can a scored plunger be reused after light polishing?
- 9.0.3 Q3: What causes premature packing failure?
- 9.0.4 Q4: Is it necessary to replace all valves and seats at the same time?
- 9.0.5 Q5: How does fluid type affect replacement part selection?
Why Fluid End Condition Determines Triplex Pump Uptime
On any well service location, the pressure-containing components inside a fluid end absorb more cyclic stress than almost any other part of the pumping system. Each stroke drives high-pressure fluid through valves, seats, and plungers that must seal instantly and repeatedly under abrasive, chemically aggressive conditions. When these parts wear unevenly or fail without warning, the resulting downtime often costs more than the replacement hardware itself.
For crews running a JWS-400 Triplex Well Service Pump, understanding how fluid end components degrade, and building a replacement strategy around measurable wear data rather than guesswork, is what separates predictable maintenance cycles from unplanned failures in the field.
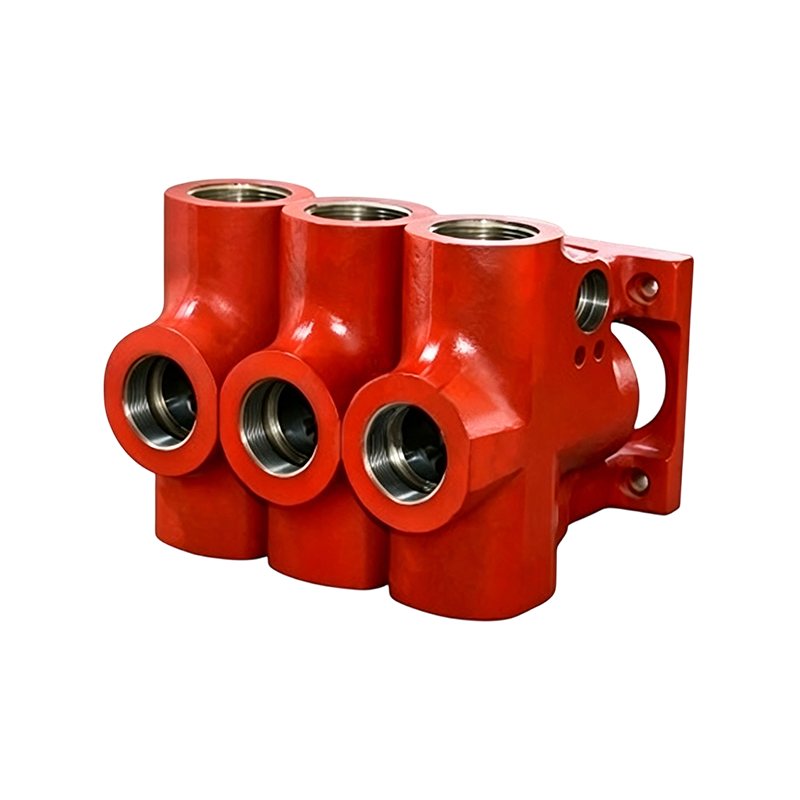
A fluid end assembly showing the valve seats, plungers, and packing arrangement that manage every pressure cycle.
Component Wear Rates: Where Failures Actually Start
Field inspection records from triplex pump rebuilds consistently point to a small group of components that account for the majority of unscheduled downtime. Valves and seats typically wear fastest because they experience direct impact and abrasive erosion on every cycle, while packing and stuffing box components fail more gradually through friction and thermal cycling.
The chart below summarizes relative wear rates measured across five commonly replaced components over a standard 1,000-hour service interval, based on aggregated field maintenance logs.
These figures explain why valve and seat kits are usually stocked in higher volume than any other fluid end part, and why inspection routines should weight visual and dimensional checks toward these two components first.
Reading the Cost Curve: When Preventive Replacement Pays Off
Maintenance cost does not rise in a straight line as a fluid end ages. Early in the service interval, cost stays low because only minor consumables need attention. Past a certain point, wear accelerates and unscheduled repair cost climbs sharply, often overtaking the cost of a planned rebuild.
Planning fluid end inspections around the inflection point on this curve, rather than waiting for a visible leak or pressure drop, is the single most effective way to keep repair budgets predictable.
Downtime by Failure Cause: What the Data Shows
Not every failure carries the same operational cost. A cracked valve seat can often be swapped within an hour, while a scored plunger bore or a cross-threaded stuffing box can take a crew off the job for a full shift or longer.
| Failure Cause | Average Downtime (hours) | Typical Detection Method |
|---|---|---|
| Valve seat cracking | 1 to 2 | Pressure fluctuation, audible knock |
| Packing leakage | 2 to 3 | Visible fluid at stuffing box |
| Plunger scoring | 4 to 6 | Gradual pressure loss |
| Fluid cylinder bore wear | 8 to 12 | Dimensional inspection |
| Suction or discharge module cracking | 10 to 16 | External fluid seepage |
Choosing Replacement Materials: A Multi-Factor Decision
Selecting a replacement component is rarely about picking the cheapest part. The right choice depends on how well a material balances wear resistance, corrosion resistance, tensile strength, cost efficiency, and machinability for the specific fluid and pressure profile in use.
Tungsten carbide coated components tend to lead on wear resistance and fatigue life, which suits abrasive or high-cycle applications, while stainless overlay parts favor corrosion resistance in chemically treated fluids. Standard alloy steel remains a reasonable middle ground when cost efficiency and machinability matter more than maximum service life. Matching the material profile to the actual operating environment, rather than defaulting to the most expensive option, avoids both premature failure and unnecessary spend.
How to Replace Fluid End Components Without Extending Downtime
A structured replacement sequence keeps a rebuild predictable and reduces the chance of reassembly errors that lead to early repeat failures. The steps below reflect a standard workflow used across triplex pump rebuilds in the field.
- Confirm the pump is fully isolated and tagged out before any covers are removed.
- Bleed residual pressure from the fluid end chambers using approved venting points.
- Remove suction and discharge covers, then extract valves, seats, and packing assemblies.
- Measure bore diameter, plunger runout, and seat pocket wear against manufacturer tolerances.
- Install new or reconditioned components in the correct orientation, using new seals throughout.
- Torque all fasteners in the specified sequence and to the specified value, not by feel.
- Run a controlled pressure test at reduced rate before returning the pump to full duty.
Field Practices That Extend Fluid End Life
Beyond scheduled part replacement, a handful of operating habits consistently correlate with longer intervals between rebuilds.
- Maintain consistent suction pressure to avoid cavitation, which accelerates valve and seat pitting.
- Flush the fluid end after exposure to abrasive or chemically aggressive fluids rather than leaving residue to dry inside the chambers.
- Track packing lubrication intervals separately from general pump service, since starved packing wears the plunger surface as well as itself.
- Log torque values and inspection measurements per rebuild so wear trends are visible across the pump's service history, not just at the point of failure.
- Store spare replacement fluid end modules in a controlled environment to prevent corrosion before installation.
Consistent measurement at every rebuild, not just visual inspection, is what turns a reactive maintenance program into a predictable one.
Fluid End Considerations Specific to the JWS-400 Platform
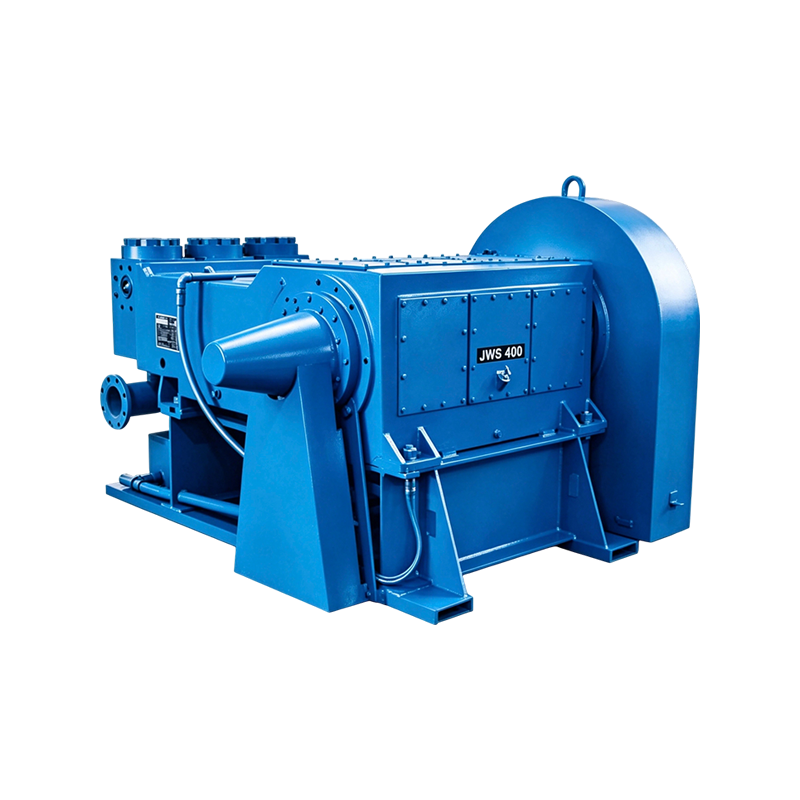
A triplex well service pump unit configured for high-pressure fluid delivery in field operations.
Triplex pumps in this power class typically operate across a wide pressure and flow envelope, which means the fluid end sees variable loading rather than a single steady-state condition. Components should be selected and inspected with that variability in mind, rather than sizing solely for peak rated pressure.
| Parameter | Typical Range | Maintenance Relevance |
|---|---|---|
| Rated input power class | Mid to high horsepower | Higher cyclic stress on valves and seats |
| Stroke rate | Variable duty cycle | Affects packing lubrication frequency |
| Discharge pressure range | Low to high pressure duty | Influences material selection for seats |
| Fluid compatibility | Water and chemically treated fluids | Drives corrosion resistance requirements |
Frequently Asked Questions
Q1: How often should fluid end valves and seats be inspected?
Most field programs inspect valves and seats every 250 to 400 operating hours, or sooner if pressure fluctuation or unusual noise is observed during operation.
Q2: Can a scored plunger be reused after light polishing?
Light surface polishing can extend service life only if the scoring is shallow and the bore is remeasured afterward. Deeper scoring should be treated as a replacement condition, since polishing cannot restore lost dimensional tolerance.
Q3: What causes premature packing failure?
Premature packing failure is most often linked to inadequate lubrication, misaligned stuffing box components, or a plunger surface that has already developed wear grooves.
Q4: Is it necessary to replace all valves and seats at the same time?
Replacing valves and seats as matched sets within the same fluid end chamber is generally recommended, since mixing worn and new components in the same cylinder can create uneven sealing and accelerate wear on the newer part.
Q5: How does fluid type affect replacement part selection?
Fluids with higher chemical treatment levels or abrasive solids content shift the priority toward corrosion-resistant or wear-resistant material options, even if that means a higher upfront part cost.
Recommended Products
-
Triplex Plunger Pump HT400 Spare Parts for Oilfield Cementing Equipment
-
Triplex Frac Pump TWS2250 Replacement Parts for Well Stimulation
-
Fluid End Housing Assembly for Triplex Mud Pump
-
JWS400 Horizontal Triplex High-Pressure Drilling Mud Pump
-
TWS2000 Fluid End Fits 2000 Three-Cylinder Fracturing Units for Severe Service Conditions
-
QWS2800 High Pressure Quintuplex Pump Fluid End Assembly for Oilfield Well Service
News
-
-
Understanding the Power End in a Triplex Well Service Pump The power end is the mechanical core of any triplex well service pump. It is the assembly responsible for converting rotational input from ...
READ MORE -
Understanding the Role of a Mud Pump Housing in Well Service Systems A mud pump housing is the structural core of any reciprocating well service pump. It is the component that carries the full weigh...
READ MORE
Get in Touch
Your email address will not be published.
Required fields are marked *
contact us
Have a project in mind?
Contact with us
Contact with us
We are happy to answer your questions. Please fill out this form
and one of our professional team will get back to you as soon as possible.

-
Company AddressRoom 2112, Wanxi Jingyuan Building 10, Jichuan Subdistrict, west of Wanxi South Road and north of Diefeng East Road, Xuanzhou District, Xuancheng City, Anhui Province
-
Tel:+86-13063235523
-
E-mail:Exwell.sales@chinafluidendparts.com
Exwell.Petro@chinafluidendparts.com
Exwell.Director@chinafluidendparts.com
Exwell@chinafluidendparts.com
Copyright © Anhui Exwell New Energy Technology Co., Ltd. All Rights Reserved.
OEM High Pressure Drilling Equipment Suppliers
